lunes, 9 de enero de 2012

we made our own double down

This post was timely.....4 or 5 months ago. You may remember the big fuss the KFC Double Down caused - the 'sandwich' made with chicken in place of the bun?

I wanted to go and try one, but I just couldn't bring myself to do it. So instead we made our own.

I cut the chicken breasts in half through the middle, then dipped them in beaten egg while, then panko bread crumbs.  And then I baked 'em.

Meanwhile, I crisped some pancetta, and made a honey mustard sauce with honey, mustard and yogurt.  When the chicken was cooked we topped one piece with sauce, cheese (I think it was Swiss) and pancetta.  Then laid the second piece of chicken on top.
And here is the finished product.
The end result was good - the chicken was flavorful and crunchy. Pancetta is always tasty and the sauce was quite nice. It was fun to try but not something I'd make on a regular basis. How it would compare to an actual double down though, I guess I might never know.

domingo, 8 de enero de 2012

Bread Baking Babes 3 Year Babe-eversary!

3 years!

What lasts 3 years anymore? Not much.

What started for me 3 years ago with this baking group became something important and inspiring in my life. A group of ladies from different countries, different lives, different ages, different experience levels became Babes and friends and made a forum where we can talk and share both our triumphs and tragedies in bread and in life.

To celebrate our Third Anniversary of our group we decided to take a walk down memory lane. Bake a bread from our archives.

When we first made the decision, I thought I might made 3 breads, one from each year of Babe-hood, but man. I hate to say I don't have the time or energy right now. So I picked one I was most proud of the first time around.

I chose to make Gorel's Brunkans Langa bread again.


What I love about this bread is the color, the rustic shape of the loaf, the hearty and just slightly sour taste. I also love that although this is a bread that takes time (5 days), it is not a difficult bread. It's an easy bread when you want to bake but don't have a day or large chunk of a day to devote.

My beautiful Babes, past and present! I raise my glass to you. Thank you for the last 3 years. Thank you for your kindness and friendship and support and inspiration. I can't wait to see what we'll do next.

Cheers!

sábado, 7 de enero de 2012

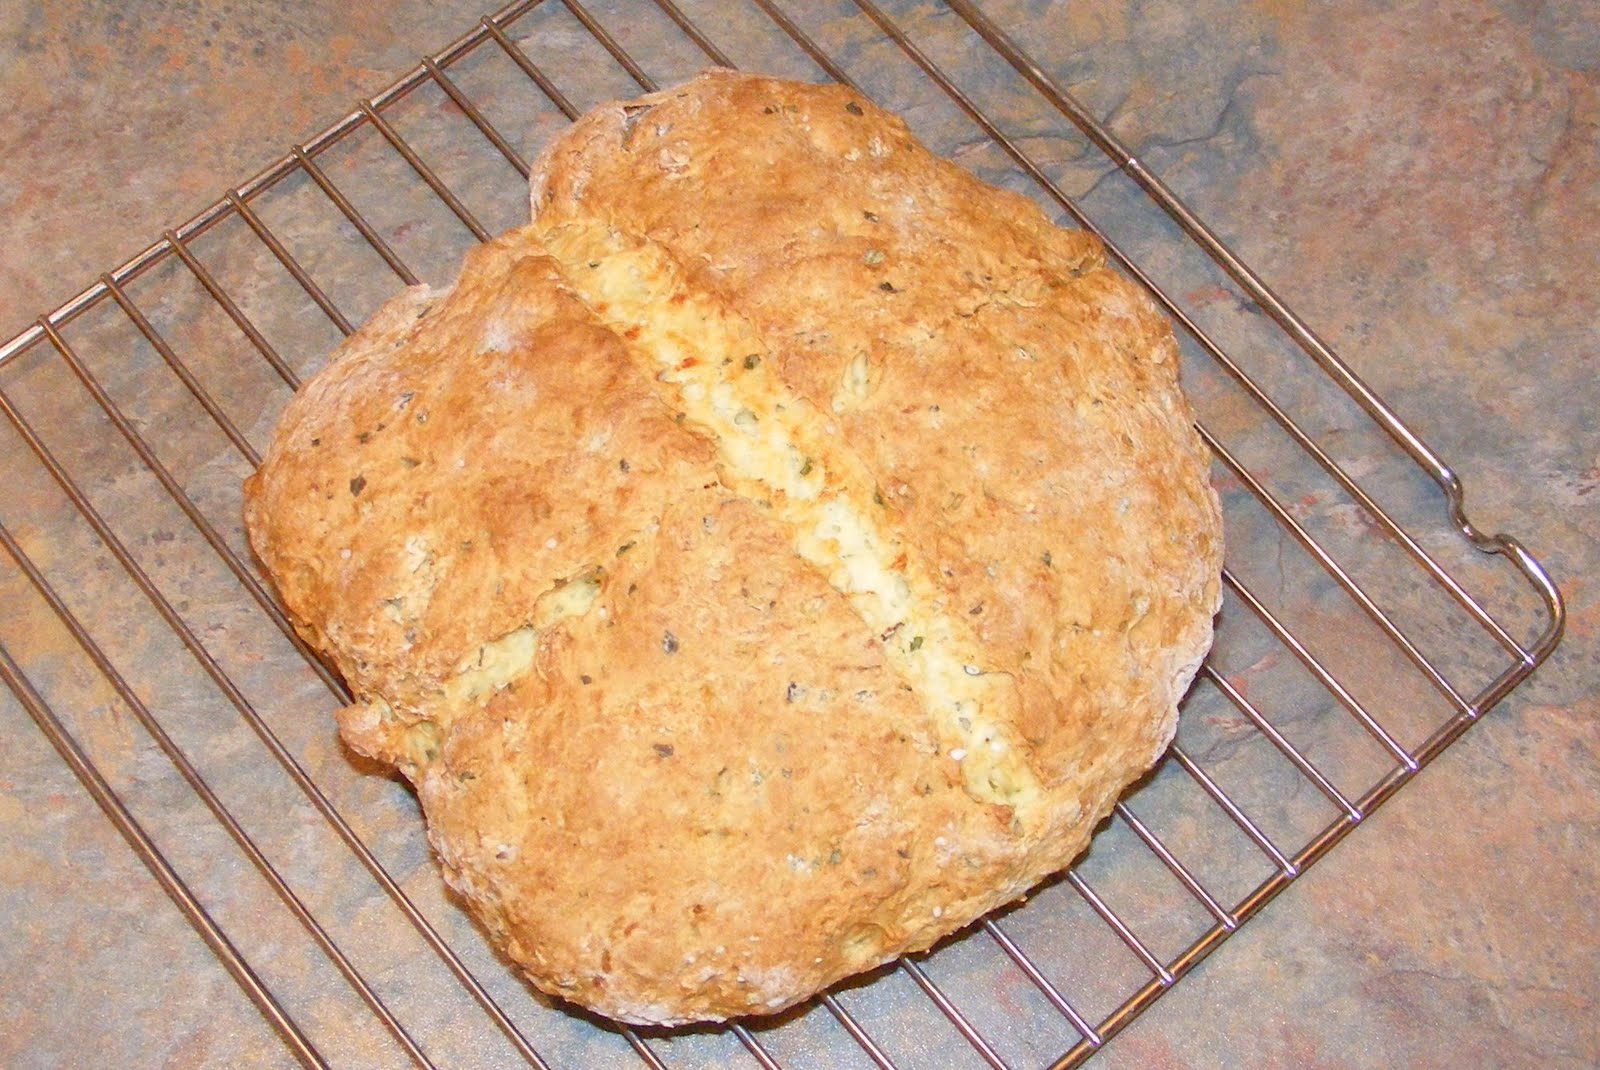
Bread Baking Babes - Irish While Soda Bread with Herbs

Kitchen of the month - Ilva from Lucullian Delights.
Recipe - Irish White Soda Bread with Herbs
Result - Delicious and easy.

Delicious and easy are 2 of my favorite things!


Apologies for this brief post.

If you'd like to be a buddy, or just make the bread, visit Ilva's website here to see the recipe.

All the Babes are listed over on the left for your viewing pleasure.

miércoles, 4 de enero de 2012

The Best Apple Pie


I know I have unfinished business with my filled cupcakes, but it's been so long since I posted that it will take me quite awhile to figure out everything I did with the cupcakes.  In the meantime, it's apple picking time, and I wanted to re-post my recipe for apple pie, which I worked on last Fall.

This is a re-post from last Fall when we went to Boston to visit our daughter.
One of the trips she had planned was to a nearby apple orchard for an afternoon of apple picking. The farm had many different varieties of apples, and we came away with more than a bushel of Cortlands, Macintosh, Empire and Macoun apples. With so many apples, the logical thing to make was apple pie, so that's what we did the next day. Expecting great things, we were disappointed when we tasted the pie, that evening. Why wasn't this the best apple pie?

Let's start with the apples. For an 8-inch pie, I usually use 10 cups of apples consisting of about 5 Granny Smith apples, 1 golden delicious and 2 Macintosh apples. It's a blend that I've come up with over the years that satisfies my requirement for texture, moisture and taste.  Using the apples from the orchard instead of my usual mix, produced a pie that wasn't sweet enough or juicy enough.  I decided to go back to the kitchen and write down what happens to each apple when it is cooked. For my experiment I used 2 ounces of each apple (about 1/2 apple, but I did it by weight for accuracy), 1 tablespoon of brown sugar and 1/6th tablespoon of butter. Each was covered with foil and baked in a 400 degree F. oven.

applepie_01
applepie_03
When I uncovered the apples there was a striking difference between the amount of liquid in each cup. The Macouns were gushers, giving off 6 teaspoons of juice, the Macintosh gave off 4 teaspoons (but the Macs I bought in the supermarket only gave off 1), the Empires 3 teaspoons (same for the store-bought Empires) and the Cortland only 1 teaspoon of juice. Since the pie we made in Boston was mostly Cortlands, I now knew why our pie was not as juicy as we would have liked. I also tested the apples that I normally use: Granny Smiths and Golden Delicious. The Granny Smiths gave off 3 teaspoons while the Goldens gave off 5. This would account for my pies almost always flooding into the plate when the first piece is removed.
applepie_0
applepie_1

Here's a chart showing my results:

Apple                   Texture        Juiciness               Sweetness

Macintosh------- Very soft-----Least------------Sweet/tart

Rome ----------- Very soft-----Least------------Sweet/tart

Cortland--------- Medium------Least------------Sweet/tart

Empire-----------Medium------Moderate--------Sweet/tart

Golden Delicious-Medium------Most------------Sweet

Macoun----------Medium------Most-------------Sweet/tart

Granny Smith----Med-firm----Moderate--------Tart

Fuji--------------Extra Firm---Moderate--------Sweet/tart

Gala-------------Extra Firm--- Moderate--------Sweet/tart

So to start making YOUR perfect pie, you would decide whether you like your pie very moist, medium-moist or on the dryer side, and then you could choose the appropriate apples. If you wanted a very sweet pie, it wouldn't be a good idea to use only Golden Delicious, though, because you'd have so much liquid, you'd never get it thick enough. Instead, you could add a little more sugar to the tarter apples and mix in only one or two of the very juicy, sweet apples. Because we wanted to use only the apples we picked (tarter , drier varieties) we should have added a little extra sugar, and could have added some fresh apple cider to make up for the lack of moisture. There's also a question of tenderness with the filling and you'd want to combine apples that get pretty soft when cooked with those that are firmer. Some apples take forever to cook, and might not be a good choice for a pie in which the crust will be done in about 50-60 minutes. Romes and Macs tend to get very mushy – which I think gives a nice taste and texture when used in combination with firmer apples. Empires, Cortlands, Macouns, Goldens, etc. are medium-firm and Fujis and Galas tend to take longer than 60 minutes to get soft, unless sliced very thinly. Lastly, the amount and kind of thickener needs to be chosen. My mother always used tapioca to thicken her pies. But tapioca (cracked or pearls) leaves little gelatinous globules in the pie that I'm not fond of. Flour is really not a favorite of mine either because if it doesn't get mixed well, it can be very unpleasant, and if the apples don't heat up enough or for a long enough time, the flour will taste gritty or pasty. I usually use cornstarch, even though it doesn't do that well with acidy foods like apple pie – another reason that my usual pie is on the runny side (maybe I should mix in some Cortlands next time). For a pie made with mostly Cortlands, I would cut way down on the amount of cornstarch used – maybe half as much. Yesterday, I tried tapioca starch, which actually gave me the absolute perfect thickness! I bought it in Earthfare, my local organic market. It looks exactly like cornstarch, and the box directions said to use the same quantity as cornstarch. I used the recipe you'll find below, and have never been as happy with the results.

But back to Boston… Could more have gone wrong with my pie in Boston? You bet. The crust was really just mediocre. I knew from the get-go that I probably hadn't used enough water in the dough. I was worried about the crust being tough – a problem I had had the last time I made flaky crust- and water is usually the culprit when crust gets tough. I thought it might be a little dry (it was), but was surprised that the crust was so tender that it barely had any texture in the mouth. As a bottom crust it was fine, but the top crust really didn't work. So, of course, my challenge when I got home was to figure out exactly how to tell when you've added enough water. Here's the answer: The dough should feel supple, but not sticky, and it should hold together. You should be able to pick up the dough ball and hold it above the counter without it falling apart.
apple pie 019
When you roll it, you should be able to fold it without it cracking.
apple pie 021
If any of these problems arise, add a little more ice water to the dough. If the dough is too sticky, it could be because it's not cold enough, or it might need more flour. If it needs to be toughened a little, you can also fold it and then re-roll it. This works especially well for the top, because it makes it flakier. And so, here is MY Perfect Apple Pie

apple pie 015
Serves 6 - 8
MAKE DOUGH 1 DAY AHEAD
Flaky Pie Crust
2-1/2 cups (325 grams) unbleached all- purpose flour, fluffed, scooped and leveled into measuring cups
1 teaspoon salt
1 tablespoon sugar
10 tablespoons (5 ounces) shortening, frozen and cut into 1/2-inch cubes
5 tablespoons (2.5 ounces) unsalted butter, cold and cut into 1/4-inch slices
1/4 cup (or more) ice water, divided
Filling3-5 medium Granny Smith apples
1 medium golden Delicious apple
2 medium McIntosh apples
1 lemon or 1 tablespoon of Fruitfresh mixed 2 quarts with water
3/4- 1 cup packed light brown sugar
1 teaspoon cinnamon
1/4 cup tapioca starch (or cornstarch)
1 tablespoon unsalted butter, cut into 1/4-inch cubes
Glaze1 tablespoon milk
1 teaspoon sugar

Place the flour, salt and sugar in a food processor bowl. Pulse-process to mix everything together. Place the shortening and butter on top of the dry ingredients. Pulse-process until the fats are cut into pea-size bits, about 5, three-second bursts. Transfer the mixture to a bowl. Sprinkle on 3 tablespoons ice water. Mix with a fork and then, using your hands, press the mixture into a solid mass. If necessary, add more water to bring the dough together. The dough should feel supple, but not sticky, and it should hold together. You should be able to pick up the dough ball and hold it above the counter without it falling apart. Divide the dough in half. Wrap each piece in plastic wrap and refrigerate several hours or overnight.

Preheat the oven to 425 degrees F. with a rack in the middle of the oven. Grease and flour an 8-inch glass pie plate . (Flouring the plate is controversial, as there is a risk that the dough could shrink off of the pie plate rim. However, it's so much easier to get the slices out of the pan when the plate is floured, that I do it anyway. )

For the filling, peel, core and cut the apples into 1/4-inch slices, using as many as necessary to have 10 cups of apples. Squeeze the lemon into a large bowl of water, or use the Fruitfresh. Place the apples into the bowl of water, drain, and then return the apples to the bowl along with the brown sugar, cinnamon and tapioca starch.
Transfer the dough to the pie plate using one of these techniques: Flip the dough over the rolling pin. Pick the whole dough piece off of the plastic and lay it into the pan.


OR
Flour the dough, fold it in half or quarters, and then transfer it to the pan and unfold it .

apple pie 021
There should be several inches of overhang. Trim the dough to 1/2-inch beyond the rim ( I use my thumbnail as a guide).
pie crust1
Transfer the filling to the crust-lined pie plate, mounding it high in the pan. Dot with the butter.
apple pie 023
Brush the rim of the crust with water so that the top crust will adhere well.
apple pie 024
Roll out the remaining dough, making it larger than the bottom crust, so that it will fit over the mounded apples.
apple pie 025
Trim the top crust so it is the same size as the bottom crust. Squeeze the two edges together and then roll the edge up to make a nice border on the pan rim.
apple pie 027
Here you can see that I've rolled the right edge of the pie crust, but not the left side, yet. I also experimented with cutting out a diamond shape in the middle of the crust as a steam vent. It also gives me a good place to stick a knife into the apples to see if they are cooked. But I think I liked the round vent hole better (see opening photo). It was easier to get it in the center and it didn't tend to rip the way the diamond did.
Flute the edge using one of the techniques from this post on Pies and Tarts: http://amazingdessertrecipes.blogspot.com/2009/03/pie-and-tart-crust-shaping.html
apple pie 028
Make 4 or 5 slits in the pie with a sharp knife. Mix the sugar with the milk and brush this over the crust ( or brush with milk and sprinkle with sugar – your choice).

Place the pie on a baking sheet. Bake the pie for 25 minutes. Reduce the temperature to 375 degrees F. and bake for another 30 - 40 minutes more until both the top and bottom crusts are golden. Shield the pie rim with aluminum foil if it is getting too brown. To make a simple shield, take 3 pieces of aluminum foil slightly large than the pie. Crimp the edges up to make it less square and to hold the pieces together. Cut a cross in the middle of the foil and bend back the foil, from the center outward, to reveal the pie below. Set the shield on top of the pie – it should leave the center open to brown but will shield the rim crust, which always cooks faster.
pastry tools 001
Cool at least 30 minutes before eating.

For best results, the pie should not be made more than 8 hours in advance (leave uncovered at room temperature). Rewarm it at 350 degrees F. for 15 minutes. Leftover pie should be covered with plastic wrap and refrigerated. Heat at 350 degrees F. to re-crisp the top crust.

All about Dijon Mustard

Dijon mustard
I never expected to visit Dijon. But on my first trip to France, I asked my Parisian friends for suggestions for where to go and they said Dijon and nearby Beaune, so off I went. The historic capital of Burgundy, Dijon is a dramatic looking city with lots to do and see. It has many museums, churches, medieval buildings with gargoyles and stunning geometrically patterned roofs of green, white, yellow, black and terra cotta ceramic tiles.

When most people think Dijon, they think mustard. But Dijon is in wine country, home of Coq au Vin, Boeuf Bourguinon and lots of other rich and rustic dishes including the classic preparation of Escargot in garlic, butter and parsley. In addition to Pinot Noir, Chardonnay, Gamay and Aligoté, the region is also known for Cremant de Bourgogne and cassis. It's worth noting that you can get to Dijon in under 2 hours from Paris if you take the TGV.

But let's talk mustard. If I had to choose one mustard only (currently I have 7 open jars in my fridge) it would be Dijon. It's mellow and sophisticated in color but with a spicy bite. It's made from brown or black mustard seeds and usually from white wine vinegar, though initially it was made with verjus, a kind of unripe grape juice. Dijon is where you'll find the original Maille shop, founded in 1747, the windows filled with handsome ceramic mustard jars of all sizes. There is another Maille boutique in Paris (right near Fauchon and Laduree at place de la Madeleine).

I'm rather fond of the Maille brand (now a subsidiary of Unilever), it works particularly well in recipes and is not very expensive. If you substitute Grey Poupon (owned by Kraft), you will notice a difference (and it does not work as well in vinaigrette recipes). In France you can buy Dijon mustard flavored with everything from cassis to blue cheese to cognac, nuts, mushrooms, and piment d'espelette. Having been on the giving and receiving end, a small jar of flavored Dijon mustard makes a fine gift.

Here are some ways to use Dijon mustard (other than on sandwiches and hot dogs)

* Combine with oil and vinegar to make a classic vinaigrette

* Add to quiche recipes, especially quiche lorraine

* Slather on fish fillets before baking

* Mix with honey to make a dipping sauce, also great on salmon

* Add a touch to macaroni and cheese

* Use in baked beans

* Combine mustard and olive oil with red potatoes then roast until crusty

* Coat pork chops or chicken in mustard then crust with panko and bake

* Add to potato and egg salads

* Spread it on bread instead of butter

* Simmer mustard with pan drippings, wine, broth and cream to make a sauce for roast chicken

* Add to barbecue sauce

Want to learn more about Dijon cuisine? August 23, 2011 Michelin star chef chefs Jean-Pierre and Alexis Billoux from Dijon will be doing cooking demos at the CUESA kitchen at the San Francisco Ferry Plaza Farmer's Market from 10 am - 2 pm as part of the Dijon Must'art tour.

martes, 3 de enero de 2012

Fresh Ricotta Crostini with Roasted Vegetables


I must have been Italian in another lifetime.  How else can one explain my daily trips to the grocery store or my obsession with making things like fresh ricotta ; ) 

If you're like me,  summer is just the best time for food - farmer's markets abound, and fresh food is the order of the day.  

With local farmer's markets, you never know what you'll be able to get on the day you visit, but I was lucky to find that one of my favorite vendors had eggplant, zucchini, peppers and some of the best looking heirloom tomatoes you've ever seen.  

Here's some of the produce from  The Specialty Farmer (Waxhaw, NC), at Cedar Walk Farmer's Market (Ardrey Kell and 521 in South Charlotte).


To make simple roasted vegetables,  preheat the oven to between 400 and 425 degrees F.  Line 1 or 2 rimmed cookie sheets with heavy-duty foil, and then lay on a sheet of non-stick foil.  Using the non-stick foil allows you to roast the vegetables with a minimum of oil.  

Pare and cut vegetables to the size you desire (quicker cooking vegetables should be cut larger and longer cooking smaller so that everything will be done at the same time).  I usually cut my veggies about 1/8-inch thick and 3/4-inch in diameter, but any size is fine, so long as you keep an eye out, so that the veggies don't overbrown or burn.  For each pound of vegetables, use 1 to 1-1/2 tablespoons fruity olive oil. You can also toss in a tablespoon of balsamic vinegar and a little mustard, if desired.  Lightly sprinkle with salt and some chopped herbs of your choice.  Make sure the veggies are all in one layer and not overlapping.  Cook for 20-30 minutes, turning halfway through, until the veggies are brown, but not dry.

I roasted one of those large round eggplants that you see in the picture (sliced as described), and it was just the most perfect vegetable - creamy and sweet, not like so many store-bought eggplants that are bitter.

The Specialty Farmer also carries the most magnificent 'yellow' zucchini.  They taste great roasted but are so sweet and the texture so nice that we actually love to eat them raw, diced and put into salads.


Roasted vegetables are wonderful as an accompaniment to any grilled meats, in pasta or on crostini, as in the opening picture.  On the crostini pictured, the lower left one has homemade herbed ricotta, roasted eggplant and an oven-dried tomato.  The upper left has the herbed ricotta, diced fresh heirloom tomatoes, and mozzarella.  The upper right has ricotta, roasted tomatoes, parmesan and fresh basil, and the lower right has roasted yellow zucchini, roasted mushrooms and the oven roasted tomatoes.  There's no limit to the combinations you can do on the crostini.  I served them last week with the ricotta, roasted veggies, fresh heirloom tomatoes and a drizzle of chocolate balsamic vinegar.  Oh my!!  More on vinegar later.

To make crostini, line a sheet with foil, and turn the oven on to high broil, with the oven rack at its highest setting.  Buy a very good quality, crusty baguette (none of that white bready stuff, please!).  I bought mine at the farmers' market from Breadsmith.  They also sell their breads at Earthfare so you don't have to wait until Tuesday's market.


Slice the baguette on the diagonal into 1/8 inch or slightly thicker slices.  Brush the slices lightly with olive oil (I used basil-scented oil - recipe follows), and sprinkle lightly with salt.  Broil the bread until nicely browned - watching carefully as it only takes 10-20 seconds.  In my oven, at 30 seconds the bread caught fire!

Remove the tray, turn the slices, brush with oil, sprinkle with salt and toast the second side.  Put on the toppings of your choice, break out a great bottle of wine, relax and think of Italy! 

To make roasted tomatoes, please see my post: Slow Roasted Tomatoes.
To make basil oil heat 1/2 cup fruity olive oil on medium heat just until warm.  Add 20 basil leaves.  Let the mixture sit for 30 minutes to several hours.  The flavor intensifies as the mixture sits.  If you're going to use it for dipping, where there are few competing flavors, 30 minutes is plenty.  

Fresh Ricotta
Fresh ricotta is easy to make but the recipe isn't precise.  That is, the amount of curdling agent is variable and you have to fiddle with the basic recipe to get the curds to form.  There are lots  recipes on the Web for  ricotta.  It's basically a question of curdling milk, and then straining out the curds and flavoring them.   (and here we are talking about fresh milk ricotta, not whey ricotta). The recipes  are very similar, with the curdling agent being lemon juice, distilled white vinegar or buttermilk.  The first time I made it, I used buttermilk.  It worked beautifully and we loved the fresh, creamy and sweet taste.  After reading several posts online, I decided to try some of the other agents.   Using vinegar was the most intriguing recipe, so for my second attempt, that's what I used.  I made it 3 different ways - by adding the vinegar after the milk had been heated, by adding the vinegar to the milk and then heating the whole concoction, and by pouring the curds and whey through the strainer, rather than lifting the curds out of the whey and placing them into the strainer.  I really disliked the version made by adding the vinegar after the milk was heated, as the ricotta had a distinct vinegar taste.  Adding it  before, resulted in only a minor vinegar taste, but reduced volume.  When I poured all of the contents into the strainer, the texture was much more dense.  It was very good - just had a different texture, and that is a matter of personal taste.  


The mound in the front right was poured through the strainer.

For my final tries, I used lemon juice.  I must have tried this 6 times, but the only way I could get the milk to curdle was to add so much lemon juice that the ricotta tastes way too tart and lemony.  Needless to say, I would not recommend using lemon juice to curdle the milk.

You'll see a lot of discussion about whether you can make ricotta with ultra-pasteurized milk.  And the answer is YES.  In fact the trials I did with pasteurized milk (not ultra) did not work as well as the ultra pasteurized milk.  This was probably due to the kind of acid I used and the temperature I cooked it to, though.

The last issue is exactly what temperature the mixture needs to be heated to.  You'll see recipes that call for heating the milk anywhere between 160 degrees F. and 190 degrees F.  Although curds did form at 160 degrees,  the best results I got were with heating the milk to about 180 degrees but not much higher. When I let the mixture get up to 190 degrees, the ricotta was a little tough and stringy - not the creamy deliciousness that came from the buttermilk mixture heated to 180.

Fresh Milk Ricotta
1/2 gallon whole milk ( I used organic ultra-pasteurized)
2-1/3 cups buttermilk, divided
1-1/2 teaspoons kosher salt

For herbed ricotta
2 tablespoons fresh minced herbs ( I used basil, thyme and sage)
1-1/2 teaspoons fruity olive oil, or basil oil
1 tablespoon  whole milk, if eating the ricotta after it has been chilled
1/2 teaspoon balsamic vinegar, optional

You'll need the following equipment:
5 quart pot
2 layers of cheesecloth lining a colander, set over a large pot or bowl
instant read or candy/oil thermometer
wooden spoon
slotted spoon

Wet the interior of the pot you are using (5 quart works well).  Add the whole milk. Heat on medium heat, stirring often until the temperature reaches 180 degrees F. (If using a candy/oil thermometer  leave it  in the pot, and if using an instant read thermometer stick it in periodically to test).  At this temperature the mixture will be starting to simmer.

Here's my whole setup:


When the mixture reaches 180 degrees F. add 2 cups of the buttermilk in a slow, steady stream, and the salt.  The mixture should be starting to curdle.  If not, add the remaining buttermilk in 2 tablespoon increments  until the mixture starts to curdle.  Do not stir, once you add the buttermilk.  You can gently move the curds to the center of the pot. Continue heating to bring the mixture back up to 180 degrees.  When the temperature is obtained, remove the pot from the heat and let the curds sit, undisturbed, for 15-30 minutes.  


Using a slotted spoon, transfer the curds to the cheesecloth-lined colander.  Once the majority of the curds have been transferred, pour the entire contents through the cheesecloth to capture the smaller curds.  let the curds drain for 15- 60 minutes, depending on how firm you want the ricotta to be.  If eating the ricotta cold, it will firm up dramatically upon refrigeration.

This ricotta has drained for about 25 minutes:


If making the herbed ricotta, add the oil, herbs and milk (if using) while the ricotta is  warm.  The ricotta is at its very best when freshly made and still warm.  Store the ricotta in the refrigerator, but bring it to room temperature before serving. 

Did I mention balsamic vinegar?  The very best I have tasted comes from a small store in West Hartford, Connecticut.  You can find them at bellagustaoils.com .  You can't order online yet, but it's coming.  The dark chocolate balsamic is absolutely to die for!


lunes, 2 de enero de 2012

GREEN CHUTNEY / CORIANDER LEAVES CHUTNEY- RESTAURANT STYLE

I call this chutney as hotel chutney. I've already posted hotel white and red chutney. This is also the same as white chutney but i add little coriander leaves. U can combine mint & coriander leaves in equal ratio and try the same. It tastes great with idly.Let's go to the recipe..

green chutney hotel style

INGREDIENTS

  • Grated Coconut – 1/4 cup
  • Green chilly – 2-3 nos
  • Dalia/ fried gram dal / pottukadalai – 1 tsp 
  • Coriander leaves – 1/4 bunch
  • Ginger – 1/2 inch
  • Garlic cloves – 2 nos
  • Lime juice – As needed (optional – Add lime juice if chutney is spicy – i dint add)
  • Salt & water – As reqd.

To temper:

  • Cooking oil – 1 tsp
  • Mustard seeds – 1/2 tsp
  • Urad dal – 1/2 tsp
  • Red chilly – 1 no (pinched into two)
  • Curry leaves – A few

METHOD

  1. Take all the ingredients given above and grind it to a smooth paste by adding sufficient water.
  2. In a kadai, temper all the items given under "to temper". Add to chutney.
  3. Serve with idly adding sesame oil.


hotel green chutney

KITCHEN CLINIC

CORIANDER LEAVES

The Health Benefits of Cilantro

List of Cilantro Benefits:
  • Powerful anti-inflammatory capacities that may help symptoms of arthritis
  • Protective agents against bacterial infection from Salmonella in food products
  • Acts to increase HDL cholesterol (the good kind), and reduces LDL cholesterol (the bad kind)
  • Relief for stomach gas, prevention of flatulence and an overall digestive aid
  • Wards off urinary tract infections
  • Helps reduce feelings of nausea
  • Eases hormonal mood swings associated with menstruation
  • Has been shown to reduce menstrual cramping.
  • Adds fiber to the digestive tract
  • A source of iron, magnesium, and is helpful in fighting anemia
  • Gives relief for diarrhea, especially if caused by microbial or fungal infections
  • Helps promote healthy liver function.
  • Reduces minor swelling
  • Strong general antioxidant properties
  • Disinfects and helps detoxify the body
  • Stimulates the endocrine glands
  • Helps with insulin secretion and lowers blood sugar
  • Acts as a natural anti-septic and anti-fungal agent for skin disorders like fungal infections and eczema
  • Contains immune-boosting properties
  • Acts as an expectorant
  • Helps ease conjunctivitis, as well as eye-aging, macular degeneration, and other stressors on the eyes.
    • Blood Sugar: Due the stimulating effect of cumin on the endocrine glands, the secretion of insulin is increased from pancreas which increases the insulin level in the blood, thereby helping proper assimilation and absorption of sugar and resultant fall in the sugar level in the blood. This property is very beneficial for thediabetes patients and others too.
    • Other benefits: Still want more from it? You get it! Coriander helps cure ulcer, inflammation, spasm and acts as an expectorant, protects and soothes liver. It is anti-carcinogenic, anti-convulsant, anti-histaminic and hypnotic. Coriander is believed to be a natural aphrodisiac and previously it was extensively used in certain preparations, combined with other herbs, to enhance libido.

Side Effects or Contraindications of Organic Cilantro

While many sources state that cilantro has little to no adverse side effects, there are some sources that warn that cilantro leaf should not be used during pregnancy, as it may lead to an increase chance of miscarriage in mothers, or may reduce chances of conception in women trying to become pregnant. If you are pregnant or breast-feeding, please consult with your health care provider before consuming cilantro in any form